Edmonton food

#SimplyBetter: Baking with Karine Moulin

October 18, 2014

Sometimes it’s the little things that make or break your day. For me, it’s always the little things that brighten my day – seeing the brightly coloured produce at the farmers market, having a sweet treat in the afternoon, or simply sitting down with my whole family for dinner.

Edo Japan recently launched a campaign with the intention to make your day #simplybetter. It can be something big, or it can be something small. The company is looking to make someone’s day simply better and it could be you! They are seeking submissions from the public that describe what makes their day better – and they want to help make it come true.

So what makes my day #simplybetter? Ever since graduating with my second degree a few weeks ago, life has been a crazy rollercoaster ride. Starting a new career has been so exciting, and balancing it with blogging and my personal life has definitely been a bit of a challenge. My boyfriend has a hectic schedule, so in combination with mine it has been difficult to find time to spend together. So what makes my day simply better is just having the opportunity to spend time with my boyfriend in the kitchen either baking or cooking. Cooking a meal together is a favourite past time of ours and we love testing out different recipes together.

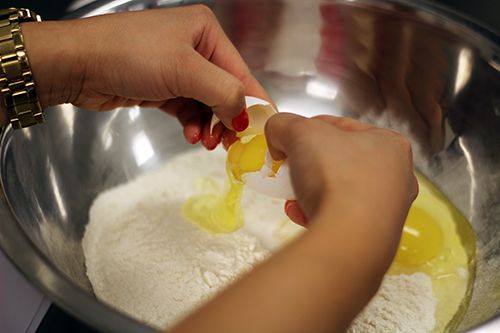
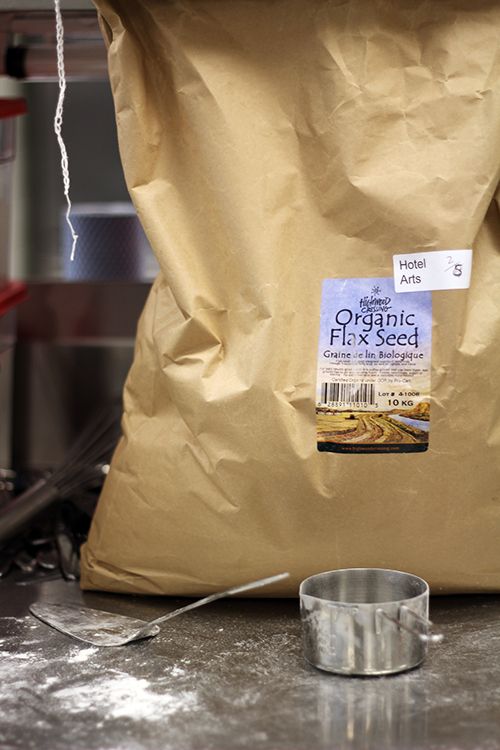
Edo Japan extended the opportunity for me to make my day simply better by providing me with a $50 gift card to make my wish come true. I jumped at the opportunity to take a baking class offered through St. Albert’s Dig in Fest last weekend. The class was taught by Karine Moulin, a competitor on season 4 of Top Chef Canada, and pastry chef at Hotel Arts in Calgary. We were both so excited to take part in her class as we rooted for her while she was on Top Chef earlier this year.

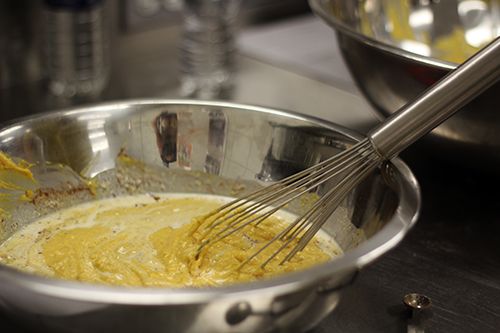
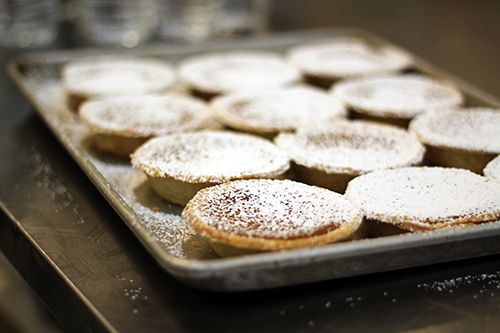
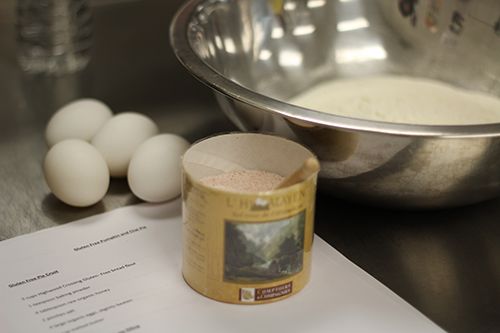
As Thanksgiving was right around the corner, Karine taught the class how to make a gluten free pumpkin and chai pie. Pumpkin pie is a must for me during this time of year, and the inclusion of chai spice was just the icing on the cake! The one hour class was so much fun and it was such a great feeling to be in a kitchen working alongside my boyfriend. We had so much fun and learned new baking tips and tricks along the way. Oh and I forgot to mention that the pie was amazing! I don’t think I will ever eat a plain ol’ pumpkin pie again.

So we both want to send a huge thank you to Edo Japan for sending us to the cooking class and making our day simply better. Although we have cooked together many times, it just felt so different learning and working together as a team in the kitchen. I would highly recommend taking a cooking class with your significant other – it’s so much fun!

So what makes your day #simplybetter? Hop on over to the Simply Better website and submit your moment. It may just come true!

-----------------------------------------------


GLUTEN FREE PUMPKIN & CHAI PIE
(recipe courtesy of Karine Moulin)

Gluten Free Crust
3 cups gluten free bread flour
1 tsp baking powder
4 tbsp raw organic honey
3 pinches salt
4 large organic eggs, slightly beaten
1 cup melted butter

Pumpkin & Chai Filling
2 organic eggs, beaten
16 oz. pureed pumpkin
1/2 tsp salt
1/4 cup raw organic honey
1 1/2 cups 35% cream
3/4 tsp cinnamon
1/4 tsp ginger
1/4 tsp ground gloves
1 tbsp chai tea spice, ground

RECIPE

Prep time: 15 minutes
Cook time: 1 hour
Yields: 1 deep dish pie (6-8 servings) OR 2 regular pies (12-16 servings)

1. Combine all crust ingredients together by hand until combined, roll into a ball and refrigerate until firm.

2. When the crust is ready, roll out and fit into pie pan. Crimp edges and set aside in the refrigerator until chilled.

3. Combine all filling ingredients together until just blended. Pour batter into pie crust.

4. Bake at 360'F/182'C for 10 minutes. Remove and line edges of crust with foil.

5. Return to oven and reduce heat to 325'F/163'C and bake for 40-50 minutes or until a toothpick comes out clean.

6. Place in refrigerator to cool.

Serving suggestions: top with whipped cream and a dash of cinnamon sugar / top with icing sugar and brulee, finish with freshly whipped cream.
Recipe

Recipe: Berry Delicious Potato Salad

August 01, 2014

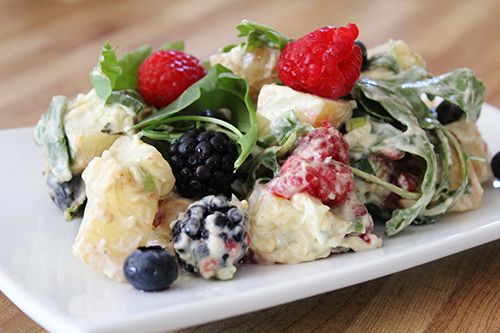
Berries... and potato salad... mixed together?! Yeah, the same thoughts ran through my mind when I was asked to test run a recipe created for the Dairy Farmers of Canada by Chef Michael Allemeier of SAIT. The 2014 Real Cream program brought four Canadian chefs together to reinvent eight classic recipes with a seasonal cream & berry twist. It would seem to be an easy task given that cream and berries pair so well, but savoury berries and cream would pose a bit of a challenge.

Chef Allemeier rose to the occasion and came up with his Berry Delicious Potato Salad. I personally enjoy potato salads, but the only fruit I've ever put in mine is apples for a bit of crunch and sweetness. I was up for the test to see if the berries really could be combined in a tangy potato salad. My boyfriend even went so far as to say I would ruin the salad with the berries, but in the end he loved it!

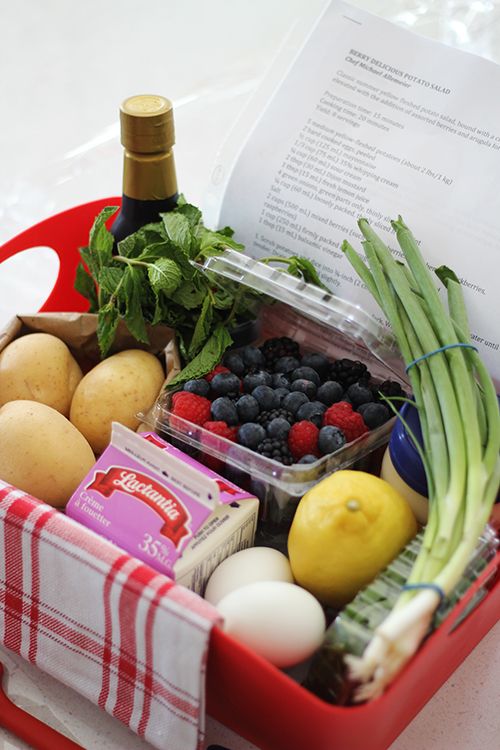
What I love about this recipe is how readily available the ingredients are in the summer months. Practically every ingredient required for the recipe is always stocked in my kitchen or growing in my garden in the summer so I could theoretically whip this potato salad up whenever I please. The recipe is simple and straightforward, so easy to put together, and the berries really make the dish pop both in aesthetic and flavour. This side dish served cold is perfect for summer picnics and BBQs, and will definitely be the talk of the party.

-----------------------------------------------


BERRY DELICIOUS POTATO SALAD
(by Chef Michael Allemeier)

Classic summer yellow fleshed potato salad, bound with a creamy hard-boiled egg dressing, elevated with the addition of assorted berries and arugula for an unexpected twist.

RECIPE

5 medium yellow-fleshed potatoes (about 2 lbs/1 kg)
2 hard cooked eggs, peeled
½ cup mayonnaise
1/3 cup 35% whipping cream
¼ cup sour cream
2 tbsp Dijon mustard
1 tbsp fresh lemon juice
4 green onions, green parts only, thinly sliced
¼ cup loosely packed, thinly sliced fresh mint
Salt to taste
2 cups (500 mL) mixed berries
1 cup (250 mL) firmly packed baby arugula leaves, stems removed
1 tbsp (15 mL) balsamic vinegar

1. Scrub potatoes and dice into ¾-inch (2 cm) pieces. Cook in large pot of salted water until tender. Drain well; let cool slightly.

2. Meanwhile, in a large bowl, mash eggs with a fork. Whisk in mayonnaise, whipping cream, sour cream, mustard, lemon juice, onions, and mint, until creamy. Add warm potatoes to dressing; season to taste with salt. Cover and refrigerate until serving.

3. To serve, in a medium bowl toss berries, arugula and balsamic vinegar; reserve some of the berries and arugula. Fold berry mixture into potato salad. Serve in a bowl or on a platter; garnish with reserved berries and arugula.

Chef’s Tip: There are many varieties of yellow-fleshed potatoes. They have a wonderful flavour and texture, perfect for potato salad. Look for Yukon Golds, Agria and Kennebec potatoes – all of these are perfect for this salad.

For prep/cooking time and nutritional information, please click here. Happy cooking!

Disclosure: All ingredients were provided by the Dairy Farmers of Canada for creation of this recipe, but all opinions are my own

Cheese

Cheese-making 101: Fresh Mozza at NAIT (+ Recipe)

February 20, 2014

Who loves fresh cheese? Who's made fresh cheese? I for one have, and it really is a fun and satisfying activity to carry out in the kitchen. The Northern Alberta Institute of Technology (NAIT) has recently launched its own line of cheese and last week I had the opportunity to stop by the campus to learn more about their new cheese-making initiative.

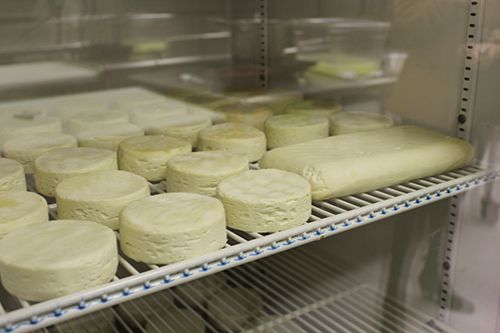
The Culinary Arts program at NAIT is now teaching students how to make artisanal cheeses from scratch and selling the product in their Retail Meat Store on campus. Currently, a selection of brie, feta and mozzarella is available for purchase, and many of the cheeses made on campus are featured in dishes cooked by the students at Ernest's, NAIT's fine dining restaurant.

In partnership with Alberta Milk and the Alberta Livestock and Meat Agency, NAIT has purchased a 200 litre cheese vat for its cheese lab. First year Culinary Arts students now take a course in the fundamentals of artisinal cheese-making and NAIT is looking towards putting together a one-day hands on cheese class for the general public. This is really exciting stuff!

I feel like a lot of people don't pursue the science of making cheese at home because it seems like a daunting task. I used to think so, until I made mozzarella for the first time two years ago. It's easy peasy. As long as you have the proper ingredients and enough time & patience (mozzarella takes about 30 minutes from start to finish), the possibilities are endless.

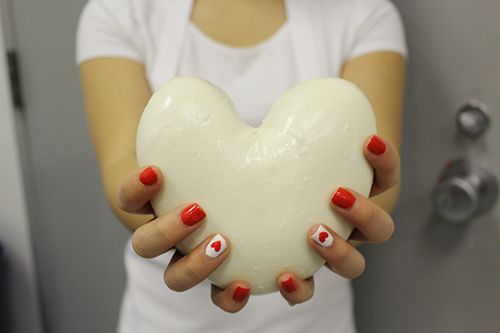
On this particular day, myself along with other media and food bloggers were invited to make a 30 minute mozzarella with Chef Allan Roote, one of the instructors at NAIT. Seeing as it was the day before Valentine's Day, I got a little goofy and made a heart shaped cheese for you all (awwww). To make your own mozzarella is simple, just gather the ingredients and follow the instructions below!

-----------------------------------------------

30 MINUTE MOZZARELLA
(recipe courtesy of NAIT)

4L 1% or 2% milk (not skim and not ultra-pasteurized)
¼ rennet tablet
1½ tsp citric acid, powdered
Non-chlorinated water
Salt

RECIPE

1. Crush ¼ tablet of rennet and dissolve in ¼ cup of cool non-chlorinated water and set aside to use later.

2. Add 1½ tsp) of powdered citric acid to 1 cup cool non-chlorinated water. Stir to dissolve.

3. Quickly pour cold milk and citric acid into a pot so they are well mixed. Next, slowly heat this mixture to 32'C/90'F - this should take about 10 minutes. Stir gently and slowly and do not touch the sides or bottom of the pot.

4. At 32'C/90'F, remove the pot from the burner and slowly add the dissolved rennet to the milk and stir in a top-to-bottom motion for approximately 30 seconds. Cover the pot and leave undisturbed for 5 minutes.

5. Check for a clean break in the curd by slicing and lifting the 'cheese'. If too soft or the whey is milky, let set for a few more minutes.

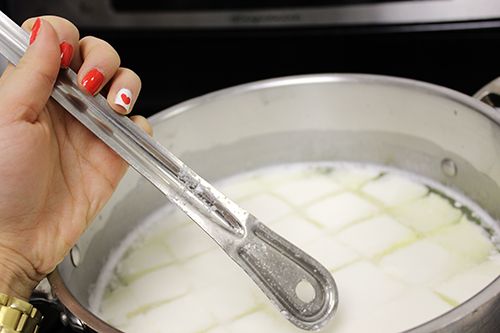
6. Cut the curd into a 1" checkerboard pattern. If a drier cheese is desired, carefully cut into smaller curd sizes and gently stir to release more whey.

7. Place the pot back on the stove and heat to 40'C/105'F while slowly stirring the curds with your hands, using a gentle lifting motion. Once that temperature is reached, take off the burner, cover and let the curd release more whey undisturbed.

8. Strain the curds through a mesh strainer or scoop them with a slotted spoon into a microwave-safe bowl.

9. Press this curd gently with your hand, pouring off as much whey as possible. Reserve this whey to use for cooling the mozzarella.

10. Microwave the curd on high for 1 minute. You will notice more whey has run out of the curd. Drain off the whey. Season the cheese to taste with salt. Quickly knead the cheese with a spoon or your hands until it is cool enough to touch (rubber gloves will help – the cheese is almost too hot to touch at this point).

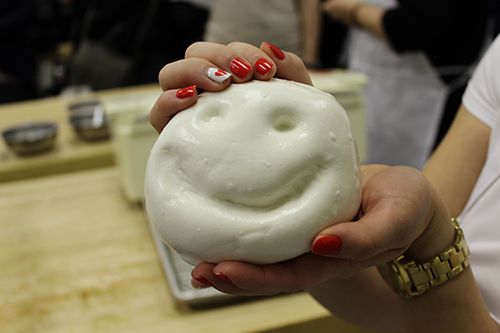
11. Microwave 2 more times for 30 seconds each and knead. Drain all of the whey as you go. Knead quickly now as you would bread dough, until the cheese is smooth and shiny. (If you want a softer texture, work the curd less when draining and kneading. This will make a moister cheese.)

12. Taste it for seasoning and add more salt if necessary. This is where you can add other spices or herbs.

13. At this point the cheese should be soft and pliable enough to stretch like taffy. It is now ready to eat or you can add ice to the reserved whey and cool your cheese in the whey. When cold you can wrap in plastic and it will last for several days, but is best when eaten fresh.

So now you must be thinking, where on earth am I going to find citric acid and rennet?! Well, I can start by telling you that citric acid is fairly common. I've picked it up at London Drugs in the pharmacy, and at Bulk Barn. As for the rennet, you can find it in a box at the Italian Centre - but you get a fair amount, so share with your friends!


NAIT's Retail Meat Store

For step by step instructions on how to make your cheese, check out this awesome video demo put together by NAIT. If somehow you're still not convinced that you can do it yourself at home, keep an eye out for the class that NAIT will be putting together in the near future!

Pretzels

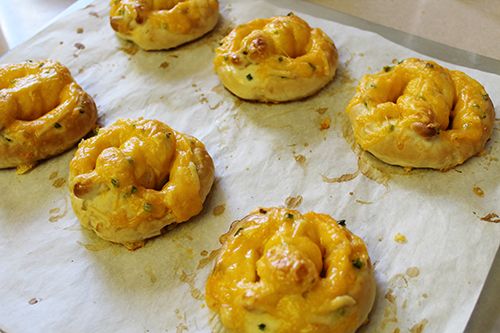
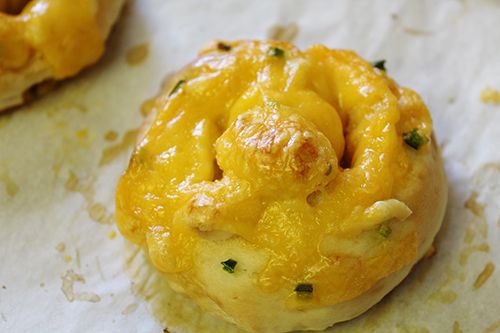
Recipe: Plain / Jalapeno & Cheddar Soft Pretzels

January 23, 2014

Back in December I decided that I was craving soft pretzels. Now I get pretty picky when it comes to soft pretzels and a lot of the ones out there just don't cut it. I'm seriously obsessed with Auntie Anne's soft pretzels and eat as many as humanly possible when I'm visiting the United States, but all other times... I get nothing. It's sad. We need a good pretzel place in Edmonton.

But now I'm off topic, lets get back to the story. In December my craving for soft pretzels was undeniable, so I decided it was time to make some of my own. I looked over a ton of different recipes for pretzels and didn't exactly find one I felt was right. And then it hit me - why not make my own version? So I spent an afternoon making pretzels and had my family taste test them. I made exactly 12 pretzels for a household of 4, and they were all gone within 12 hours. And I only ate one. What?

Seeing as it was unfair, I made another batch so I could eat some. Then I got sabotaged by my father 'cause he decided I needed to make millions of them so that he could give them away as Christmas gifts for our family friends. Long story short? These pretzels are really good. I've been getting lots of questions about the pretzels, especially after posting a picture of them up on Instagram. So here it is folks, the long awaited recipe. Enjoy!


The picture that started it all.

-----------------------------------------------
RECIPE

1 cup milk
2 1/4 teaspoons (1 packet) active dry yeast
3 tablespoons brown sugar
2 tablespoons melted butter
2 cups flour
1 teaspoon salt
2 cups shredded cheddar cheese
1 finely chopped jalapeno pepper
water
baking soda
2 cups warm water
1/4 cup baking soda

makes 12 pretzels

1. Warm up the milk to about 110'F - it should be warm but not hot. Stir in the yeast and let sit for 5 minutes.

2. Add in the brown sugar and melted butter, stirring until thoroughly mixed.

3. Add in the flour and salt, combining the mixture together.

4. Knead by hand for approximately 10 minutes on a lightly floured surface. The mixture will be sticky, but should not stick to the surface you are kneading on. If it is, you may need some additional flour.

5. Place dough into a greased bowl, covering with greased syran wrap. Allow the dough to rise in a warm place for 1 hour.

6. After 1 hour combine 2 cups of warm water with 1/4 cup baking soda. Stir to dissolve and set aside. Preheat the oven to 450'F

7. Take the risen dough and punch it down slightly. Split the dough into quarters. From each quarter, further divide the dough into 3 portions. This should give you twelve balls of dough.

8. Take one ball and roll the dough into a long, thin rope. Make a pretzel shape with the rope, and while preserving the shape, dip it into the baking soda water. Place the pretzel onto a parchment lined baking sheet. Repeat for the remaining 11 dough balls, placing the formed pretzels 1.5 - 2 inches from one another (I like to do 6 pretzels/baking sheet).

9. If you want plain pretzels, sprinkle the tops with some sea salt and proceed to step 11. If you want jalapeno & cheddar pretzels, proceed to step 10.

10. Lightly embed pieces of chopped jalapeno pepper into the pretzels, ensuring that they will not fall off. Sprinkle with cheese to your liking, but don't be stingy!

11. Place pretzels into the preheated oven for 8-10 minutes, removing when golden brown or the cheese is bubbling away. Allow to cool slightly before eating - enjoy! Best baked & eaten within the same day.

friends

Recipe: Fun in the Kitchen - Perogies from Scratch

September 06, 2013

Perogies. Who doesn't love perogies? It's comfort food to the fullest, and definitely food coma material. And there's so many ways to cook and customize them that there's something for everyone. What's your favourite?

A couple months ago, I set aside an afternoon to spend with my lovely friends K, A, M & G to make perogies from scratch. Yep. It really helps when you have a friend who's grandmother is a perogy whiz and grew up learning to make them with her - one phone call was all it took for us to get the secret recipe. And now I get to share it with you!

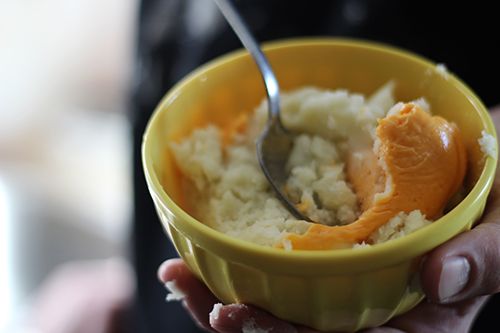
I think the thing that scares people the most about making perogies is the dough. Well, at least it was what I was most unsure about. Like, what goes in the dough? Fillings are easy - mash up some potatoes, add your favourite fixins and voila, wrap it in the dough and cook it up.


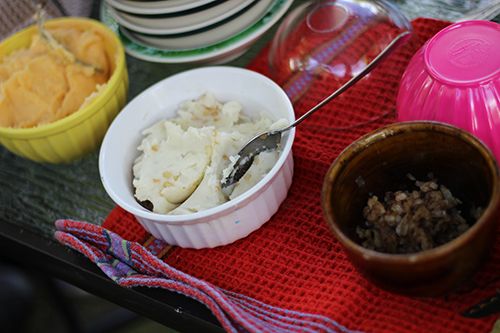
Fillings for perogies

But surprisingly, this dough has two ingredients. Literally. Flour and sour cream mixed together to achieve a doughy consistency, rolled out and cut to the perfect size. And once it's cooked up, it tastes amazing! With a little prep work and elbow grease, you can make your perogies in the afternoon and serve them up for dinner.

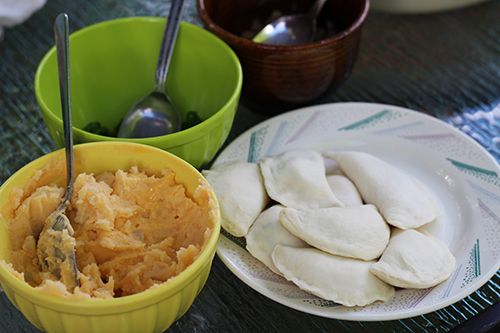
The funnest part in the whole process is getting the hang of filling the dough and shaping the perogies. For the filling, we had mashed up potatoes as our base, and added different components to change things up. One was a cheesy potato filling, while another had green onions, and others yet had some diced up caramelized onions. Want more ideas? Try bacon or mushrooms - whatever makes you happy! Pro tip: K's grandmother suggested using Cheez Whiz to make potatoes cheesy, as it is much easier to incorporate. But I'm sure if you cooked up a quick cheese sauce with your favourite cheese it would be the same.

The bunch of us together had so much fun making the perogies. All of ours looked different from one another, and it was fun making an activity out of it. G went and did some "perogy inception" - he put a small perogy into a larger one. Oh, boys.


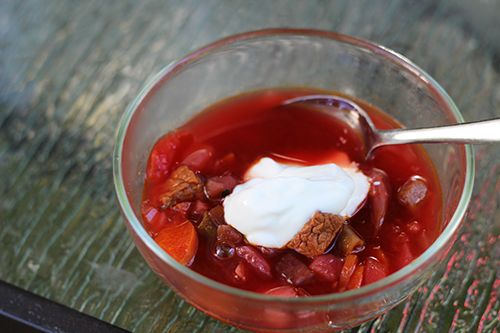
borscht

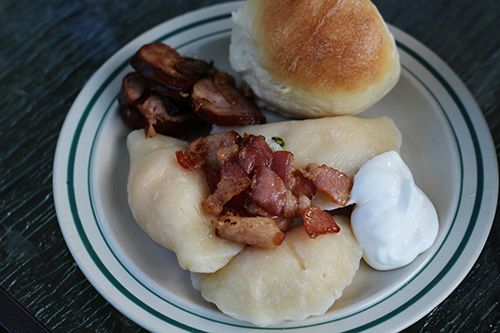
Once all the perogies were folded up and ready to cook, we boiled them, hoping they wouldn't burst open in the cooking process. Together we fried up some bacon, sausages, and onions - the house smelled amazing!

Buns, perogies, sausages, bacon, borscht, and sour cream galore - we had a feast to serve at least 10 people. The process was easy and straightforward enough that I could totally do it again if I had the craving. Homecooked is always the best, as you're able to control what you are making and eating, and you're able to tailor things to your dietary needs.

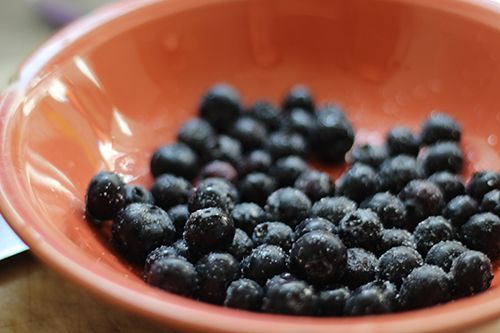
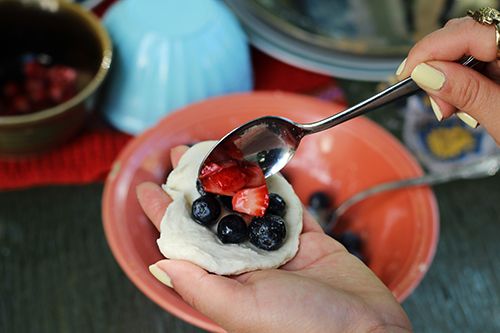
When K grew up, her grandmother also made dessert perogies. This was something completely new to me, and I had no idea what we would be putting in them. For the afternoon, we decided to fill our sweet perogies with blueberries and strawberries tossed with a bit of sugar. Cooked up and served with yogurt, they were delicious! I can only imagine filling them with other fun things... like chocolate.. or salted caramel.. oh man. So grab some friends and have a perogy feast!


-----------------------------------------------
RECIPE

Flour
Tub of Sour Cream
Potatoes
Fillings of your choice

1. While stirring the sour cream, add flour 1/4 cup at a time to achieve a doughy consistency (you will have to watch carefully and adjust the flour). When the dough is ready, it will be barely sticky to the touch and stretchy. Knead slightly to ensure everything is thoroughly incorporated, and place in the fridge for 30-45 minutes (longer is not a problem).

2. Prepare your fillings for perogies.

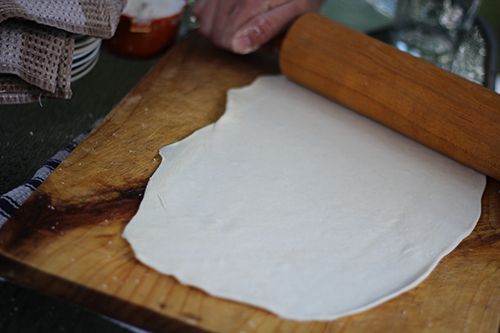
3. After refrigerating, roll out the dough to a thickness of 0.5cm. The dough should not stick to the surface it is being rolled out on. Cut with a cookie cutter or a cup with an approximate diameter of 6cm.

4. In your hands, work the dough slightly, thinning out the centre and edges. Place a dallop of filling into the centre, then fold the dough in half, pressing tightly on the edges to seal your perogy.

5. Bring to boil a pot of salted water, and drop in the perogies to cook. The perogies will float when they are ready to eat.

6. Serve them up the way you like & enjoy!

-----------------------------------------------

Super easy, right? Let me know in the comments below if you try this recipe out!

chips

Microwave Potato Chips?!

November 23, 2012

Yeah, you must think I'm crazy making potato chips in the microwave. Or on the flip side you might think I'm a genius, and you'll want to be making these with me!

I've been on a bit of a potato kick lately. I'm loving making potato wedges, breakfast hashbrowns, roasted potatoes, you name it. I love my carbs. So one day I was craving chips, and of course, when you crave something SO badly and can't have it, your mind will not stop thinking about it.

So then I started thinking of alternatives, but nothing was satisfying. So I decided to try something out, and surprisingly it worked. Thanks to my microwave! So yes, these are a great quick fix if you're craving some chips, and what I love about them is that they are quite healthy since they are made without oil - you need nothing except the potato itself, and some seasoning if you please.

They're not made with an energy efficient process, and you may want to argue that I am consuming huge amounts of radiation - go with your gut and do what you want. But these are a quick fix for perfectly crispy chips when I'm craving some and I love them. Let me know your results if you try these out!


{Sriracha Variation}

Microwave Potato Chips

1. Wash and slice a potato into thin rounds (1/8 to 1/16 of an inch thick). I use a mandoline for this process, but a sharp knife will work as well

2. Place the slices into a bowl of ice cold water for 3-5 minutes to soak. Afterwards, rinse them off until the water becomes clear

3. Dry the potato slices with a cloth or paper towel

4. Prepare a large plate lined with a paper towel, and place the dried potato slices on the paper towel, ensuring the potato slices are not touching one another

5. Season the slices to your liking (I like garlic salt!)

6. Microwave the potato slices for 3 minutes. Remove them from the microwave to flip them over, and microwave again for an additional 2 minutes. The potatoes should be golden brown & crispy, ready to enjoy.

*Depending on the size of your potato, you may have to microwave 2-3 batches in order to prepare chips from a whole potato
*If you have an inverter microwave, I would decrease the microwaving time by 30 seconds!

Quinoa

Recipe: Vietnamese Style Quinoa Salad

July 07, 2012

Heat waaaave. It's so hot here in Edmonton for the next five days.. I want to hide in my air conditioned house, but I also want to be outside to enjoy the sun. Decisions, decisions...


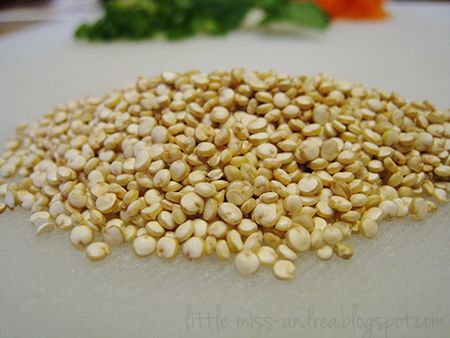
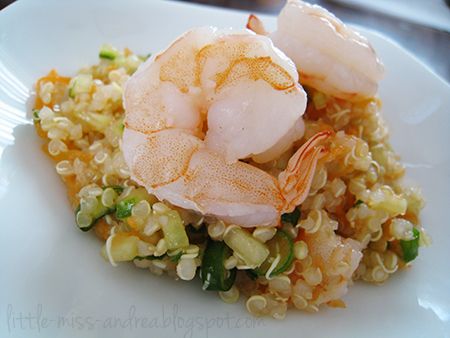
Let me just put this out there: I am OBSESSED with quinoa. Seriously. I can search hours on end for ideas as to what I can do with this stuff! I love that it's so healthy, and that a small amount will cook and double in size! Basically I've been eating it nonstop lately.. So I made this cold salad last week, and it's perfect to eat on hot summer days. It's healthy, and so easy to whip up. Enjoy!

----------------------------------------


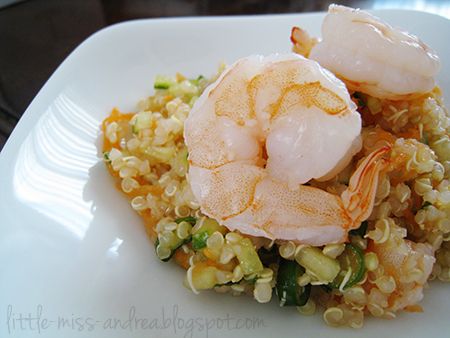
Vietnamese Style Quinoa Salad with Shrimp

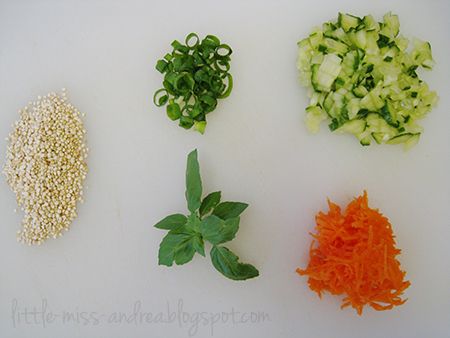
Ingredients for the Salad
1/2 pound of shrimp, deveined & cooked
1 cup quinoa
1 carrot, shredded
1/2 long english cucumber, finely diced
2 green onions, finely chopped

Ingredients for the Dressing
5 tablespoons fresh lime juice
1 tablespoon Vietnamese fish sauce
1 tablespoon vegetable oil
1 tablespoon sugar
1 teaspoon Sriracha sauce (more if you desire!)
2-3 large leaves of basil, chopped


Directions
1. Cook quinoa according to directions on packaging. Typically 1 cup quinoa to 2 cups water, simmer 15 minutes until water is fully absorbed. Set aside and allow to cool.

2. For the dressing, combine lime juice, fish sauce, oil, sugar, basil & Sriracha in a bowl.

3. Set aside 2 or 3 shrimp for garnish. Take the remaining shrimp and chop into bite sized pieces, then place in the dressing and allow to marinate for 5-10 minutes.

4. Once the quinoa is cool, add the cucumber, green onion and carrots, then mix everything with the shrimp and dressing. Adjust the taste if necessary. Garnish with reserved shrimp and the salad is ready to serve, but I prefer to pop it into the fridge for about an hour to cool it down. Enjoy!


Recipe inspired by Serious Eats

dessert

Recipe: Homemade Plain Frozen Yogurt

March 28, 2012

It shouldn't come as a surprise to you if I say one of my all time favourite desserts is frozen yogurt! I always favour frozen yogurt over ice cream, and I love making stops by local self serve yogurt shops like Tutti Frutti or Twisted Yogurt.

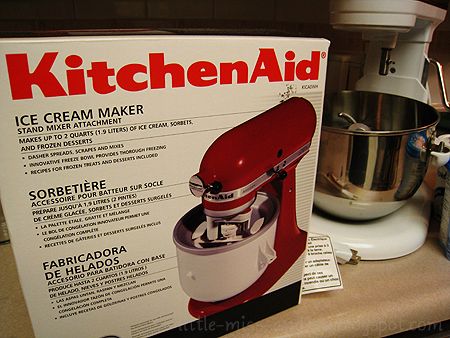
But, when it isn't a stop along the way home, or if I'm too lazy to go out, I have a solution: make it at home! This past Christmas, one of my gifts was the ice cream maker attachment to my KitchenAid Stand Mixer. I was ecstatic and so excited to try making some froyo! Don't have an ice cream maker sitting at home? No problem, you should be able to make frozen yogurt as long as you have a freezer and some patience.


TOOLS

KitchenAid Mixer, KitchenAid Ice Cream Maker, Bowl
Whisk, Measuring cups, Measuring spoons, Spatula


INGREDIENTS

2 cups plain Greek yogurt
2 cups plain yogurt
3 tbsp corn syrup
1/2 cup berry sugar (superfine sugar)


RECIPE

Freeze the ice cream maker attachment 15 hours in advance.
Place all four ingredients into a bowl.
Whisk together ingredients until fully combined - place mixture into fridge for 5 - 10 minutes.
Assemble the ice cream maker and turn it on to the 'Spin' setting.
Pour in the mixture and allow to mix until desired consistency is reached.

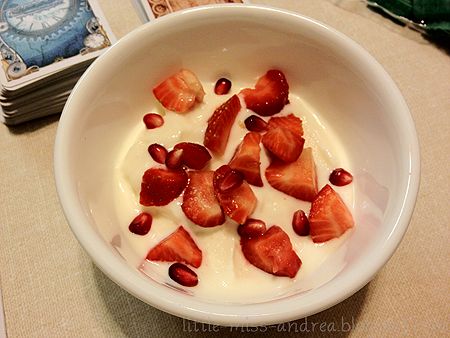
Garnish with any toppings you like, and eat up!

If you want to make the yogurt without an ice cream maker, place the mixture in a freezer safe bowl (or pan), and put it in the freezer. Every 20 minutes or so, take the mixture out of the fridge to mix it around until you are satisfied with the final product.


The ice cream maker attachment is awesome! The frozen yogurt that comes out of it is the same consistency as that from local frozen yogurt shops, and tastes almost exactly identical. It just isn't beautifully swirled into the bowl :) For any leftover yogurt, it can be placed in a container and into the freezer, where it will freeze into a hard block. To reachieve the soft consistency, take the container out of the freezer and allow it to thaw for a minimum 30 minutes before mixing manually and eating it! Super simple, and good for you!

If you do choose to buy the KitchenAid ice cream maker attachment, just let me mention that the only part I dislike about it, is the mess that can be created when you pour the ice cream mixture in. The mix is poured in with the paddle attachment moving, giving the opportunity for the mix to go everywhere. This can be minimized by pouring the batter in with a bowl that has a spout or tip for pouring.

Froyo lovers, let me know if you try this!

This recipe is from the Food Network

baking

Recipe: Baking Adventures - Macaronnage

February 04, 2012

If you follow me on Twitter, you'll know that I've been on a baking binge lately! No, not THAT kind of baking.. but rather, dessert baking.

If you've never had a macaron before, it's basically a meringue based cookie sandwich, that can be any which flavour you desire. The shells usually come in a variety of colours, while the fillings are many different flavours. Macarons themselves are characterized by having "feet" at the bottom of the cookie, and they're notoriously difficult to make.

"Macaronnage" is the process of making the perfect macaron. I've heard that making them takes lots of practise, so I challenged myself to make them, to see how well they would turn out on my first try.

I put together this recipe after hours of reading recipes and watching macaron making videos! Unfortunately, things didn't turn out exactly how I wanted them to, so I will be pointing out mistakes along they way. That way you won't make them! Enjoy!

Tools

Mixer
Kitchen Scale
Piping bag
Large rounded piping tip
Baking sheet w/ parchment paper or Silpat sheet


INGREDIENTS

Cookies:
90g Eggwhites aged at room temperature for 24 hours (approx. 3 eggs)
20g granulated sugar
200g powdered sugar
110g almond flour (finely ground almonds)
Food colouring (optional)

Vanilla Buttercream:
1/2 cup unsalted butter
1 - 2 cups confectioner's sugar
3 teaspoons vanilla extract
1 - 2 tablespoons milk
pinch of salt


Aged eggwhites after 6 hours


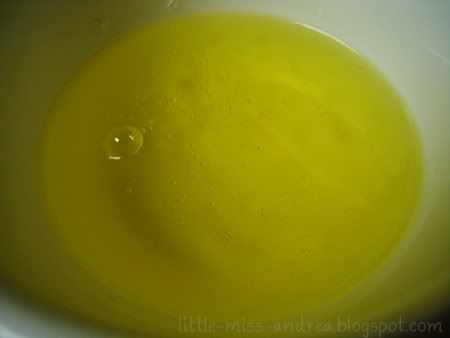
Now, I'm really paranoid about food safety. I thought to myself.. 24 hours of eggwhites at room temperature has to be wrong! Wouldn't the whites go bad? Well, if you look up there, that's the whites after 6 hours at room temperature. It starts to form bubbles.. so I was scared and put the bowl back into the fridge! The aging of the eggwhites is very important for the formation of the characteristic foot, so go ahead and leave them out for 24 hours. After a full day, you can put the whites into the fridge.


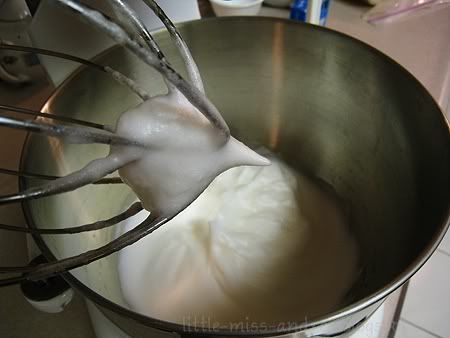
To start off, take the aged egg whites, and whip them until they start to form a foam (seen above). Gradually add in the sugar while mixing, until you reach the look and consistency of a glossy meringue (seen below).


While whipping the egg whites, I was worried about over beating. Beating the egg whites too much will result in a dry cookie, so I stopped when the mixture looked like the image above. I'm pretty sure that I actually didn't beat the eggs enough, as the peak isn't very stiff, and it looks more foamy than glossy. But I went ahead anyway. When making these macarons, make sure you have stiff peaks forming in the mixture, but not so stiff that its a gooey mess.


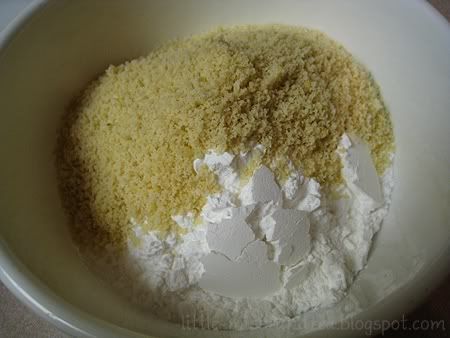
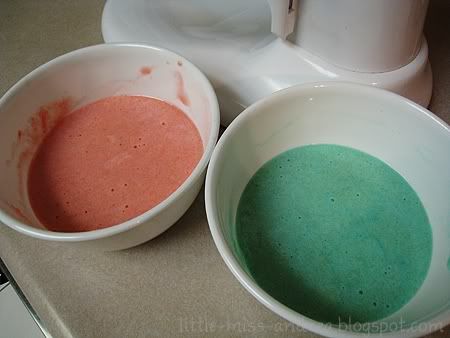
Take the almond flour and combine it with the confectioner's sugar in a separate bowl (if your almond flour is not finely ground, give it a good pulsing in a food processor). Fold the dry mixture into the meringue, being careful not to overmix - it shouldn't take more than 50 strokes to mix it all together. I chose to add some colour to my cookies, so around the 35-40th stroke, I poured my mixture into two different bowls, added my desired colours, and continued to mix until fully incorporated.


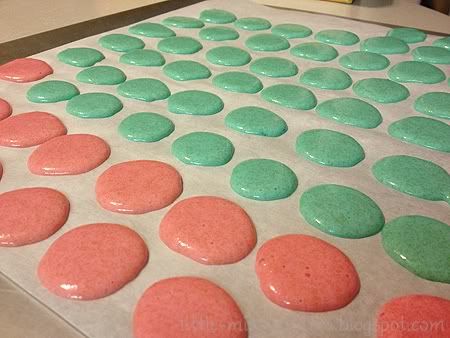
I made both pink & blue cookies in this batch. Fill a piping bag fitted with a round tip with the batter, and pipe onto sheets in rounds with a 1 to 1.5" diameter (depends on how large you want your cookies). Now here's where the good part comes in. Right when I was reading to pipe the batter.. I honestly could NOT find my piping bag and tips. It was GONE. So I made due and used Ziploc bags and cut the corners. I do not recommend the use of Ziploc bags at all when making macarons. The batter becomes relatively runny when warmed by the hands, and the ziploc bag is too small and too flimsy to work with. I had to use so much effort just to stop the cookies from being piped too big..


So much irregularity.. I'm embarassed! But hey, we can learn from my mistakes! :) When you're done piping, lift and drop the pans on a hard surface a couple times, to rid of any bubbles. Preheat the oven to 280F and allow the pans to sit out for 30 minutes. Bake for 15 - 20 minutes.

In the meantime, you can put together the vanilla buttercream. Beat the butter until soft, and gradually add 1 cup of the confectioner's sugar at low speed. When fully incorporated, choose a higher speed and add the vanilla extract, salt, and a tablespoon of milk. Beat for 2-3 minutes, or until smooth. If the frosting isn't holding shape, add more confectioner's sugar. If it needs to be thinned out, add a little milk.

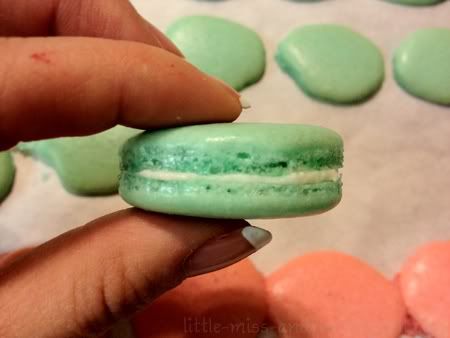
Once the cookies are baked and cooled, group them into pairs of similar size and shape. Pipe or spoon the butter cream mixture onto a cookie, and squish it's partner right on top.


And this is how my first ever batch of macarons turned out. They look fine, but were not to my full expectations. I wanted a more prominent foot.. All the more reason to try again!

Let me know if you try the recipe out, and how things turn out for you!

Instagram

Find Me on Facebook